In the Element ID text
box (displayed in Simple view)
enter the value for the id attribute. It will
uniquely identify the element (image) in page.
In the Width text box (displayed in Simple
view) specify a new width for the selected image (in pixels).
· If you
do not specify any dimension in the Height text
box as well (and leave the Constrain control
to its default, namely the chain
symbol), its value will be automatically calculated (according to the
width you entered) and the image size will be modified proportionally.
· If you
also enter a value in the Height text box (after
switching the Constrain control to the broken chain symbol), no automatic recalculation
will be done this time (the image ratio and quality could get damaged
if you enter both values).
In the Height text box
(displayed in Simple view) specify
a new height for the selected image (in pixels).
· If you
do not specify any dimension in the Width text
box as well (and leave the Constrain control
to its default, namely the chain
symbol), its value will be automatically calculated (according to the
height you entered) and the image size will be modified proportionally.
· If you
also enter a value in the Width text box (after
switching the Constrain control to the broken chain symbol), no automatic recalculation
will be done this time (the image ratio and quality could get damaged
if you enter both values).
Note: To keep the original size of the image, leave the Width and Height text boxes
to their default values. You can also resize the image without using the
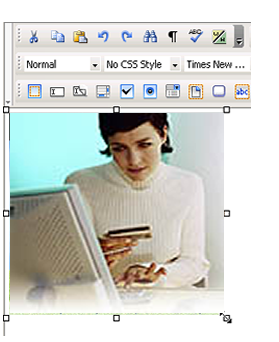
Image Properties panel. Simply select it in
the D-Web editable region and then drag the
resize handlers:
Connecting somehow the Width
and Height text boxes, you'll notice the Constrain control that has only two appearances (symbols),
namely chain and broken
chain:
 and
and 
They alternate according to your mouse-clicks. If you are resizing
an image and you want to do it:
proportionally, make sure the chain
symbol is displayed. Once you enter one of the dimensions, the other one
will be automatically calculated so to maintain the proportion.
not proportionally (independent dimensions),
make sure the Constrain control displays the
broken chain symbol.
The Src text box (displayed
in Simple view) displays the path
on the remote server to the source image file. By clicking the Browse
for Image button on the right, the Remote
File Explorer window will display, giving you the possibility
to replace the selected image with a new one of your choice.
In the Link text box
(displayed in Simple view) enter
a correct URL to a web page or to a document on your remote server (you
can use the Browse for File button on the right
for this), and when clicking on the image, you will be redirected to that
page/document.
In the Border text box
(displayed in Simple view) enter
the thickness (in pixels) of the border that you want displayed around
the image. The default value is 0 (no border is displayed).
By clicking the Advanced
button (displayed in Simple view),
the Image Properties panel will switch to Advanced view. You will be offered the
possibility of setting advanced options for the currently selected image.
In the H Space text
box (displayed in Advanced view)
specify the horizontal distance (in pixels) between the image and the
other page elements (images, table borders, text) to its left and right.
These other page elements can be present in page or can be added at a
later time: they will not get closer to the image than the horizontal
space set. The default value is 0 (zero).
In the V Space text
box (displayed in Advanced view)
specify the vertical distance (in pixels) between the image and the other
page elements (images, table borders, text) above and below it. These
other page elements can be present in page or can be added at a later
time: they will not get closer to the image than the vertical space set.
The default value is 0 (zero).
In the Alt text box
(displayed in Advanced view) enter
the alternative text (tooltip) to be displayed by browsers that do not
support images. In most common browsers, this text also appears when the
pointer is over the image.
The Align drop-down
menu (displayed in Advanced view)
contains the options for the image position in relation with the other
page elements:
Default
Baseline
Top
Middle
Bottom
Text Top
Absolute Middle
Absolute Bottom
Left
Right
By clicking the Simple
button (displayed in Advanced
view), the Image Properties panel will switch
to Simple view. You will be offered
the possibility of setting various options for the currently selected
image.